รัน Qiskit Serverless workload แรกของคุณจากระยะไกล
Package versions
โค้ดในหน้านี้ถูกพัฒนาโดยใช้ข้อกำหนดต่อไปนี้ แนะนำให้ใช้เวอร์ชันเหล่านี้หรือใหม่กว่า
qiskit[all]~=1.4.0
qiskit-ibm-runtime~=0.36.1
qiskit-ibm-catalog~=0.4
Qiskit Serverless กำลังได้รับการอัปเกรด และฟีเจอร์ต่าง ๆ กำลังเปลี่ยนแปลงอย่างรวดเร็ว ในช่วงการพัฒนานี้ สามารถค้นหา release notes และเอกสารล่าสุดได้ที่หน้า Qiskit Serverless GitHub
ส่วนนี้สำรวจวิธีใช้ qiskit-ibm-catalog เพื่อแสดงรายการโปรแกรมที่มีใน Qiskit Serverless ส่ง input เข้าโปรแกรม รันจากระยะไกล ตรวจสอบสถานะ และดึงผลลัพธ์กับ log
ตรวจสอบให้แน่ใจว่าคุณได้ทำตามขั้นตอนใน เขียนโปรแกรม Qiskit Serverless แรกของคุณ ก่อนเริ่มต้น
แสดงรายการโปรแกรมที่มี
คุณสามารถใช้ QiskitServerless.list() เพื่อดึงรายการโปรแกรมที่มีสำหรับรันด้วย Qiskit Serverless ซึ่งรวมถึง transpile_remote_serverless ที่อัปโหลดไว้ก่อนหน้า
# Added by doQumentation — installs the packages this notebook needs if they are missing
import importlib.util

_needed = {"qiskit": "qiskit", "qiskit_ibm_catalog": "qiskit-ibm-catalog", "qiskit_ibm_runtime": "qiskit-ibm-runtime"}
_missing = [pip for module, pip in _needed.items()
            if importlib.util.find_spec(module) is None]
# One at a time, so a package that fails to install does not block the others
for _pip in _missing:
    %pip install -q {_pip}
if not _missing:
    print("\u2713 All required packages are installed")
from qiskit_ibm_catalog import QiskitServerless

serverless = QiskitServerless()
next(
    program
    for program in serverless.list()
    if program.title == "transpile_remote_serverless"
)
QiskitFunction(transpile_remote_serverless)
รันโปรแกรมที่อัปโหลดและส่ง input
ขั้นแรก ตั้งค่า input ของคุณ โปรแกรมมี input สามตัวคือ: circuits, backend และ optimization_level คุณสามารถใช้ random_circuit เพื่อสร้าง Circuit สุ่ม 30 ตัว:
from qiskit.circuit.random import random_circuit

qc_random = [(random_circuit(4, 4, measure=True, seed=i)) for i in range(10)]
qc_random[0].draw(output="mpl", idle_wires=False)
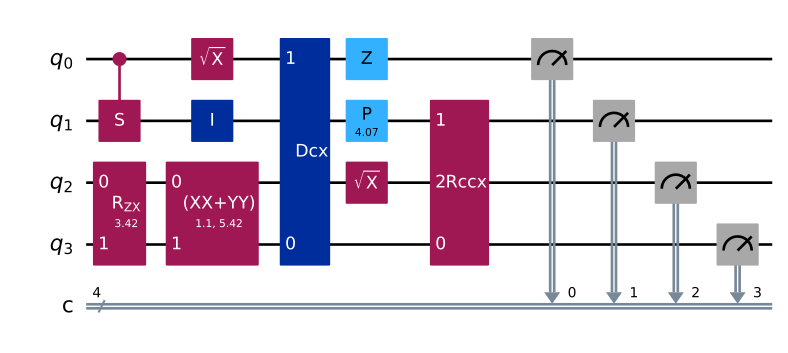
จากนั้น ใช้ QiskitRuntimeService และ least_busy เพื่อเลือก backend:
from qiskit_ibm_runtime import QiskitRuntimeService

service = QiskitRuntimeService()
backend = service.least_busy(operational=True, simulator=False)
print(backend.name)
ตั้งค่าระดับ optimization ของคุณ:
optimization_level = 3
เลือกโปรแกรมของคุณด้วย serverless.load('PROGRAM_NAME'):
transpile_remote_serverless = serverless.load("transpile_remote_serverless")
จากนั้น ส่ง input และรันในรูปแบบ pythonic ดังนี้:
job = transpile_remote_serverless.run(
    circuits=qc_random,
    backend=backend.name,
    optimization_level=optimization_level,
)
job.job_id
'118256c5-bbb0-4ea8-9e9f-51aac2220aef'
ตรวจสอบสถานะ job
ด้วย job_id ของ Qiskit Serverless คุณสามารถตรวจสอบสถานะของ job ที่กำลังรัน ซึ่งรวมถึงสถานะต่อไปนี้:
-
QUEUED: โปรแกรมระยะไกลอยู่ในคิว Qiskit Serverless ปัจจุบันลำดับความสำคัญของคิวขึ้นอยู่กับปริมาณการใช้งาน Qiskit Serverless ของคุณ -
INITIALIZING: โปรแกรมระยะไกลกำลังเริ่มต้น ซึ่งรวมถึงการตั้งค่า environment ระยะไกลและติดตั้ง dependencies -
RUNNING: โปรแกรมกำลังรันอยู่ ในขั้นตอนนี้ หากโปรแกรมมีผลลัพธ์print()คุณสามารถดึง log ได้โดยใช้job.logs() -
DONE: โปรแกรมเสร็จสมบูรณ์ และคุณสามารถดึงข้อมูลที่จัดเก็บในsave_result()ด้วยjob.results()
คุณยังสามารถตั้งค่าสถานะ job แบบละเอียดได้ใน จัดการทรัพยากรการคำนวณและข้อมูลของ Qiskit Serverless
job.status()
'QUEUED'
# This cell is hidden from users, it checks the job status
assert _ in ["QUEUED", "INITIALIZING", "RUNNING", "DONE"]  # noqa: F821
ปัจจุบัน ตาราง IBM Quantum workloads แสดงเฉพาะ IBM Quantum Compute Service workloads เท่านั้น ใช้ job.status() เพื่อดูสถานะปัจจุบันของ Qiskit Serverless workload ของคุณ
คุณรัน Qiskit Serverless program แรกสำเร็จแล้ว!
ดึง log และผลลัพธ์
ดังที่กล่าวไว้ก่อนหน้า เมื่อโปรแกรมอยู่ในสถานะ RUNNING คุณสามารถใช้ job.logs() เพื่อดึง log ที่สร้างจากผลลัพธ์ print():
logs = job.logs()
print(logs)
No logs yet.
คุณยังสามารถยกเลิก job ได้ทุกเมื่อ:
job.stop()
'Job has been stopped.'
เมื่อโปรแกรมอยู่ในสถานะ DONE คุณสามารถใช้ job.results() เพื่อดึงผลลัพธ์ที่จัดเก็บใน save_result():
# We can't get results from a cancelled job, so we'll fetch a completed one instead
completed_job = next(
    job for job in serverless.jobs() if job.status() == "DONE"
)
completed_job.result()
{'transpiled_circuits': [<qiskit.circuit.quantumcircuit.QuantumCircuit at 0x7f93eca64810>,
  <qiskit.circuit.quantumcircuit.QuantumCircuit at 0x7f93ec5e5310>,
  <qiskit.circuit.quantumcircuit.QuantumCircuit at 0x7f93ec5d5310>,
  <qiskit.circuit.quantumcircuit.QuantumCircuit at 0x7f93ec58b490>,
  <qiskit.circuit.quantumcircuit.QuantumCircuit at 0x7f93ec57d310>,
  <qiskit.circuit.quantumcircuit.QuantumCircuit at 0x7f93ec535950>,
  <qiskit.circuit.quantumcircuit.QuantumCircuit at 0x7f93ec523c90>,
  <qiskit.circuit.quantumcircuit.QuantumCircuit at 0x7f93ec60a990>,
  <qiskit.circuit.quantumcircuit.QuantumCircuit at 0x7f93ec5527d0>,
  <qiskit.circuit.quantumcircuit.QuantumCircuit at 0x7f93ec4152d0>]}
แสดงรายการ job ที่รันด้วย Qiskit Serverless ก่อนหน้า
คุณสามารถใช้ jobs() เพื่อแสดงรายการ job ทั้งหมดที่ส่งไปยัง Qiskit Serverless:
old_jobs = serverless.jobs()
old_jobs
[<Job | 118256c5-bbb0-4ea8-9e9f-51aac2220aef>,
 <Job | e9a36469-7d6b-4f00-bf91-78709ebdbbff>,
 <Job | 4efd601b-8f61-4c8e-b14a-0b8a9c649dc0>,
 <Job | 87cd22c7-8eb9-4606-bdb4-befe946e9e9b>,
 <Job | be9a6dfd-0830-4250-aa60-acdd05bb8818>,
 <Job | 479513dd-6a76-4c3e-ba49-bb21351b9a05>,
 <Job | f9c20c31-be46-41b3-97ac-99f7be61f89e>,
 <Job | 37fa2489-4449-4bfb-974e-9d9a9ec3cc21>,
 <Job | b754c4e8-6817-48db-9bb9-74c151d6349a>,
 <Job | 78bc6744-b417-48cb-8e01-59bb63bcc2be>]
ขั้นตอนถัดไป
- สำรวจเครื่องมือจัดการการคำนวณและข้อมูล ที่มีสำหรับโปรแกรมของคุณ รวมถึงการประมวลผลแบบขนาน