เพิ่มประสิทธิภาพการจำแนกคุณสมบัติด้วย projected quantum kernels
ประมาณการใช้งาน: 80 นาทีบนโปรเซสเซอร์ Heron r3 (หมายเหตุ: นี่เป็นเพียงการประมาณ เวลาที่ใช้จริงอาจแตกต่างออกไป)
ผลลัพธ์การเรียนรู้
หลังจากผ่านบทช่วยสอนนี้แล้ว ผู้ใช้ควรเข้าใจ:
- วิธีการทำงานของ projected quantum kernels (PQK) และเมื่อใดที่มีศักยภาพได้เปรียบเชิงควอนตัม
- วิธีรัน PQK บนฮาร์ดแวร์จริงโดยใช้ชุดข้อมูลจากโลกจริง
ข้อมูลพื้นฐานที่จำเป็น
เราแนะนำให้ผู้ใช้คุ้นเคยกับหัวข้อต่อไปนี้ก่อนเริ่มบทช่วยสอนนี้:
- Quantum kernels จากคอร์ส quantum machine learning ใน IBM Quantum® Learning
ภูมิหลัง
ในบทช่วยสอนนี้ เราจะแสดงวิธีรัน projected quantum kernel (PQK) ด้วย Qiskit บนชุดข้อมูลทางชีววิทยาในโลกจริง โดยอ้างอิงจากบทความ Enhanced Prediction of CAR T-Cell Cytotoxicity with Quantum-Kernel Methods [1]
PQK เป็นวิธีการที่ใช้ในการเรียนรู้ของเครื่องเชิงควอนตัม (QML) เพื่อเข้ารหัสข้อมูลแบบคลาสสิกลงในพื้นที่คุณสมบัติเชิงควอนตัม และฉายกลับมายังโดเมนคลาสสิก โดยใช้คอมพิวเตอร์ควอนตัมช่วยคัดเลือกคุณสมบัติ วิธีนี้ประกอบด้วยการเข้ารหัสข้อมูลแบบคลาสสิกลงในสถานะควอนตัมโดยใช้ Circuit ควอนตัม ซึ่งโดยทั่วไปจะผ่านกระบวนการที่เรียกว่า feature mapping ซึ่งข้อมูลจะถูกแปลงเป็น Hilbert space มิติสูง ลักษณะ "projected" หมายถึงการดึงข้อมูลแบบคลาสสิกจากสถานะควอนตัม โดยการวัด observable ที่เฉพาะเจาะจง เพื่อสร้าง kernel matrix ที่สามารถนำไปใช้ในอัลกอริทึมแบบ kernel-based แบบคลาสสิก เช่น support vector machines วิธีนี้ใช้ประโยชน์จากข้อได้เปรียบเชิงการคำนวณของระบบควอนตัมเพื่อให้ได้ประสิทธิภาพที่ดีขึ้นในงานบางอย่างเมื่อเทียบกับวิธีแบบคลาสสิก
ส่วนประกอบหลักของ PQK คือ reduced density matrices (RDMs) ที่ได้มาจากการวัดแบบ projective ของ quantum feature map โดยเฉพาะอย่างยิ่ง โดยทั่วไปจะคำนวณ single-qubit reduced density matrices (1 RDMs) สำหรับแต่ละ Qubit จากนั้นปริมาณที่วัดได้เหล่านี้จะถูกนำมาใช้เป็น input ของฟังก์ชัน classical kernel เช่น exponential kernel เพื่อสร้าง kernel matrix สุดท้าย
PQK มีข้อได้เปรียบที่เป็นไปได้เหนือ quantum kernels มาตรฐาน โดยเฉพาะสำหรับฮาร์ดแวร์ควอนตัมระยะใกล้ Quantum kernels มาตรฐานโดยทั่วไปต้องประมาณ global state overlaps ซึ่งยากขึ้นเรื่อยๆ ในการวัดอย่างแม่นยำเมื่อจำนวน Qubit เพิ่มขึ้น และไวต่อ noise มาก ในทางตรงกันข้าม PQK ใช้ local observables เช่น single-qubit reduced density matrices (1 RDMs) ซึ่งให้ overhead ในการสุ่มตัวอย่างที่ต่ำกว่า ความทนทานต่อ hardware noise ที่ดีขึ้น และความสามารถในการขยายขนาดที่ดีขึ้น โดยการฉายสถานะควอนตัมลงบน local measurement features ก่อนใช้ฟังก์ชัน classical kernel PQK สามารถรักษา quantum correlations ที่มีประโยชน์ไว้ได้ในขณะที่ยังคงใช้งานได้จริงมากขึ้นสำหรับอุปกรณ์ระยะใกล้
ข้อกำหนด
ก่อนเริ่มบทช่วยสอนนี้ ให้ตรวจสอบให้แน่ใจว่าคุณได้ติดตั้งสิ่งต่อไปนี้แล้ว:
- Qiskit SDK v2.0 ขึ้นไป พร้อมรองรับ visualization
- Qiskit Runtime v0.40 ขึ้นไป (
pip install qiskit-ibm-runtime) - Category encoders 2.8.1 (
pip install category-encoders) - NumPy 2.3.2 (
pip install numpy) - Pandas 2.3.2 (
pip install pandas) - Scikit-learn 1.7.1 (
pip install scikit-learn) - Tqdm 4.67.1 (
pip install tqdm)
การตั้งค่า
# Added by doQumentation — required packages for this notebook
!pip install -q category-encoders numpy pandas qiskit qiskit-ibm-runtime scipy scikit-learn tqdm
import warnings

# Standard libraries
import os
import numpy as np
import pandas as pd

# Machine learning and data processing
import category_encoders as ce
from scipy.linalg import inv, sqrtm
from sklearn.metrics.pairwise import rbf_kernel
from sklearn.model_selection import GridSearchCV, StratifiedKFold
from sklearn.svm import SVC

# Qiskit and Qiskit Runtime
from qiskit import QuantumCircuit
from qiskit.circuit import ParameterVector
from qiskit.circuit.library import UnitaryGate, ZZFeatureMap
from qiskit.quantum_info import SparsePauliOp, random_unitary
from qiskit.transpiler import generate_preset_pass_manager
from qiskit_ibm_runtime import (
    Batch,
    EstimatorOptions,
    EstimatorV2 as Estimator,
    QiskitRuntimeService,
)

# Progress bar
import tqdm

warnings.filterwarnings("ignore")
ตัวอย่าง Simulator ขนาดเล็ก
เราข้ามตัวอย่าง simulator ขนาดเล็กในบทช่วยสอนนี้ เนื่องจากเป้าหมายหลักของเราคือการแสดงให้เห็นว่า projected quantum kernels สามารถขยายขนาดไปยังระบบขนาดใหญ่และฮาร์ดแวร์จริงได้อย่างไร
ตัวอย่างฮาร์ดแวร์ขนาดใหญ่
ขั้นตอนที่ 1: แปลง input แบบคลาสสิกเป็นปัญหาเชิงควอนตัม
การเตรียมชุดข้อมูล
ในบทช่วยสอนนี้ เราใช้ชุดข้อมูลทางชีววิทยาในโลกจริงสำหรับงานจำแนกแบบ binary ซึ่งสร้างโดย Daniels et al. (2022) และสามารถดาวน์โหลดได้จาก supplementary material ที่แนบมาพร้อมบทความ ข้อมูลประกอบด้วย CAR T-cells ซึ่งเป็น T-cells ที่ผ่านการดัดแปลงพันธุกรรมที่ใช้ในการรักษาด้วยภูมิคุ้มกันบำบัดสำหรับมะเร็งบางชนิด T-cells ซึ่งเป็นเซลล์ภูมิคุ้มกันชนิดหนึ่ง ถูกดัดแปลงในห้องปฏิบัติการเพื่อแสดง chimeric antigen receptors (CARs) ที่กำหนดเป้าหมายโปรตีนเฉพาะบนเซลล์มะเร็ง T-cells ที่ดัดแปลงเหล่านี้สามารถจดจำและทำลายเซลล์มะเร็งได้อย่างมีประสิทธิภาพมากขึ้น คุณสมบัติของข้อมูลคือ motif ของ CAR T-cell ซึ่งหมายถึงส่วนประกอบโครงสร้างหรือฟังก์ชันเฉพาะของ CAR ที่ถูกสร้างขึ้นใน T-cells จาก motif เหล่านี้ งานของเราคือการทำนาย cytotoxicity ของ CAR T-cell ที่กำหนด โดยจัดป้ายกำกับเป็น toxic หรือ non-toxic ต่อไปนี้แสดงฟังก์ชันตัวช่วยสำหรับการประมวลผลชุดข้อมูลนี้ล่วงหน้า
def preprocess_data(dir_root, args):
    """
    Preprocess the training and test data.
    """
    # Read from the csv files
    train_data = pd.read_csv(
        os.path.join(dir_root, args["file_train_data"]),
        encoding="unicode_escape",
        sep=",",
    )
    test_data = pd.read_csv(
        os.path.join(dir_root, args["file_test_data"]),
        encoding="unicode_escape",
        sep=",",
    )

    # Fix the last motif ID
    train_data[train_data == 17] = 14
    train_data.columns = [
        "Cell Number",
        "motif",
        "motif.1",
        "motif.2",
        "motif.3",
        "motif.4",
        "Nalm 6 Cytotoxicity",
    ]
    test_data[test_data == 17] = 14
    test_data.columns = [
        "Cell Number",
        "motif",
        "motif.1",
        "motif.2",
        "motif.3",
        "motif.4",
        "Nalm 6 Cytotoxicity",
    ]

    # Adjust motif at the third position
    if args["filter_for_spacer_motif_third_position"]:
        train_data = train_data[
            (train_data["motif.2"] == 14) | (train_data["motif.2"] == 0)
        ]
        test_data = test_data[
            (test_data["motif.2"] == 14) | (test_data["motif.2"] == 0)
        ]

    train_data = train_data[
        args["motifs_to_use"] + [args["label_name"], "Cell Number"]
    ]
    test_data = test_data[
        args["motifs_to_use"] + [args["label_name"], "Cell Number"]
    ]

    # Adjust motif at the last position
    if not args["allow_spacer_motif_last_position"]:
        last_motif = args["motifs_to_use"][len(args["motifs_to_use"]) - 1]
        train_data = train_data[
            (train_data[last_motif] != 14) & (train_data[last_motif] != 0)
        ]
        test_data = test_data[
            (test_data[last_motif] != 14) & (test_data[last_motif] != 0)
        ]

    # Get the labels
    train_labels = np.array(train_data[args["label_name"]])
    test_labels = np.array(test_data[args["label_name"]])

    # For the classification task use the threshold to binarize labels
    train_labels[train_labels > args["label_binarization_threshold"]] = 1
    train_labels[train_labels < 1] = args["min_label_value"]
    test_labels[test_labels > args["label_binarization_threshold"]] = 1
    test_labels[test_labels < 1] = args["min_label_value"]

    # Reduce data to just the motifs of interest
    train_data = train_data[args["motifs_to_use"]]
    test_data = test_data[args["motifs_to_use"]]

    # Get the class and motif counts
    min_class = np.min(np.unique(np.concatenate([train_data, test_data])))
    max_class = np.max(np.unique(np.concatenate([train_data, test_data])))

    num_class = max_class - min_class + 1
    num_motifs = len(args["motifs_to_use"])
    print(str(max_class) + ":" + str(min_class) + ":" + str(num_class))

    train_data = train_data - min_class
    test_data = test_data - min_class

    return (
        train_data,
        test_data,
        train_labels,
        test_labels,
        num_class,
        num_motifs,
    )

def data_encoder(args, train_data, test_data, num_class, num_motifs):
    """
    Use one-hot or binary encoding for classical data representation.
    """
    if args["encoder"] == "one-hot":
        # Transform to one-hot encoding
        train_data = np.eye(num_class)[train_data]
        test_data = np.eye(num_class)[test_data]

        train_data = train_data.reshape(
            train_data.shape[0], train_data.shape[1] * train_data.shape[2]
        )
        test_data = test_data.reshape(
            test_data.shape[0], test_data.shape[1] * test_data.shape[2]
        )

    elif args["encoder"] == "binary":
        # Transform to binary encoding
        encoder = ce.BinaryEncoder()

        base_array = np.unique(np.concatenate([train_data, test_data]))
        base = pd.DataFrame(base_array).astype("category")
        base.columns = ["motif"]
        for motif_name in args["motifs_to_use"][1:]:
            base[motif_name] = base.loc[:, "motif"]
        encoder.fit(base)

        train_data = encoder.transform(train_data.astype("category"))
        test_data = encoder.transform(test_data.astype("category"))

        train_data = np.reshape(
            train_data.values, (train_data.shape[0], num_motifs, -1)
        )
        test_data = np.reshape(
            test_data.values, (test_data.shape[0], num_motifs, -1)
        )

        train_data = train_data.reshape(
            train_data.shape[0], train_data.shape[1] * train_data.shape[2]
        )
        test_data = test_data.reshape(
            test_data.shape[0], test_data.shape[1] * test_data.shape[2]
        )

    else:
        raise ValueError("Invalid encoding type.")

    return train_data, test_data
คุณสามารถรันบทช่วยสอนนี้ได้โดยรัน cell ต่อไปนี้ ซึ่งจะสร้างโครงสร้างโฟลเดอร์ที่จำเป็นโดยอัตโนมัติและดาวน์โหลดทั้งไฟล์ training และ test โดยตรงลงในสภาพแวดล้อมของคุณ ถ้าคุณมีไฟล์เหล่านี้อยู่แล้วในเครื่อง ขั้นตอนนี้จะเขียนทับอย่างปลอดภัยเพื่อให้แน่ใจว่าเวอร์ชันสอดคล้องกัน
## Download dataset

# Create data directory if it doesn't exist
!mkdir -p data_tutorial/pqk

# Download the training and test sets from the official Qiskit documentation repo
!wget -q --show-progress -O data_tutorial/pqk/train_data.csv \
  https://raw.githubusercontent.com/Qiskit/documentation/main/datasets/tutorials/pqk/train_data.csv

!wget -q --show-progress -O data_tutorial/pqk/test_data.csv \
  https://raw.githubusercontent.com/Qiskit/documentation/main/datasets/tutorials/pqk/test_data.csv

!wget -q --show-progress -O data_tutorial/pqk/projections_train.csv \
  https://raw.githubusercontent.com/Qiskit/documentation/main/datasets/tutorials/pqk/projections_train.csv

!wget -q --show-progress -O data_tutorial/pqk/projections_test.csv \
  https://raw.githubusercontent.com/Qiskit/documentation/main/datasets/tutorials/pqk/projections_test.csv

# Check the files have been downloaded
!echo "Dataset files downloaded:"
!ls -lh data_tutorial/pqk/*.csv
args = {
    "file_train_data": "train_data.csv",
    "file_test_data": "test_data.csv",
    "motifs_to_use": ["motif", "motif.1", "motif.2", "motif.3"],
    "label_name": "Nalm 6 Cytotoxicity",
    "label_binarization_threshold": 0.62,
    "filter_for_spacer_motif_third_position": False,
    "allow_spacer_motif_last_position": True,
    "min_label_value": -1,
    "encoder": "one-hot",
}
dir_root = "./"

# Preprocess data
train_data, test_data, train_labels, test_labels, num_class, num_motifs = (
    preprocess_data(dir_root=dir_root, args=args)
)

# Encode the data
train_data, test_data = data_encoder(
    args, train_data, test_data, num_class, num_motifs
)
14:0:15
เรายังแปลงชุดข้อมูลด้วยเพื่อให้ แทนด้วย สำหรับวัตถุประสงค์ด้านการปรับขนาด
# Change 1 to pi/2
angle = np.pi / 2

tmp = pd.DataFrame(train_data).astype("float64")
tmp[tmp == 1] = angle
train_data = tmp.values

tmp = pd.DataFrame(test_data).astype("float64")
tmp[tmp == 1] = angle
test_data = tmp.values
เราตรวจสอบขนาดและรูปร่างของชุดข้อมูล training และ test
print(train_data.shape, train_labels.shape)
print(test_data.shape, test_labels.shape)
(172, 60) (172,)
(74, 60) (74,)
ขั้นตอนที่ 2: ปรับปัญหาให้เหมาะสมสำหรับการรันบนฮาร์ดแวร์ควอนตัม
Quantum Circuit
ตอนนี้เราจะสร้าง feature map ที่ใช้ฝังชุดข้อมูล classical ของเราลงใน feature space มิติสูงขึ้น สำหรับการฝังนี้เราใช้ ZZFeatureMap จาก Qiskit
feature_dimension = train_data.shape[1]
reps = 24
insert_barriers = True
entanglement = "pairwise"

# ZZFeatureMap with linear entanglement and a repetition of 2
embed = ZZFeatureMap(
    feature_dimension=feature_dimension,
    reps=reps,
    entanglement=entanglement,
    insert_barriers=insert_barriers,
    name="ZZFeatureMap",
)
embed.decompose().draw(output="mpl", style="iqp", fold=-1)

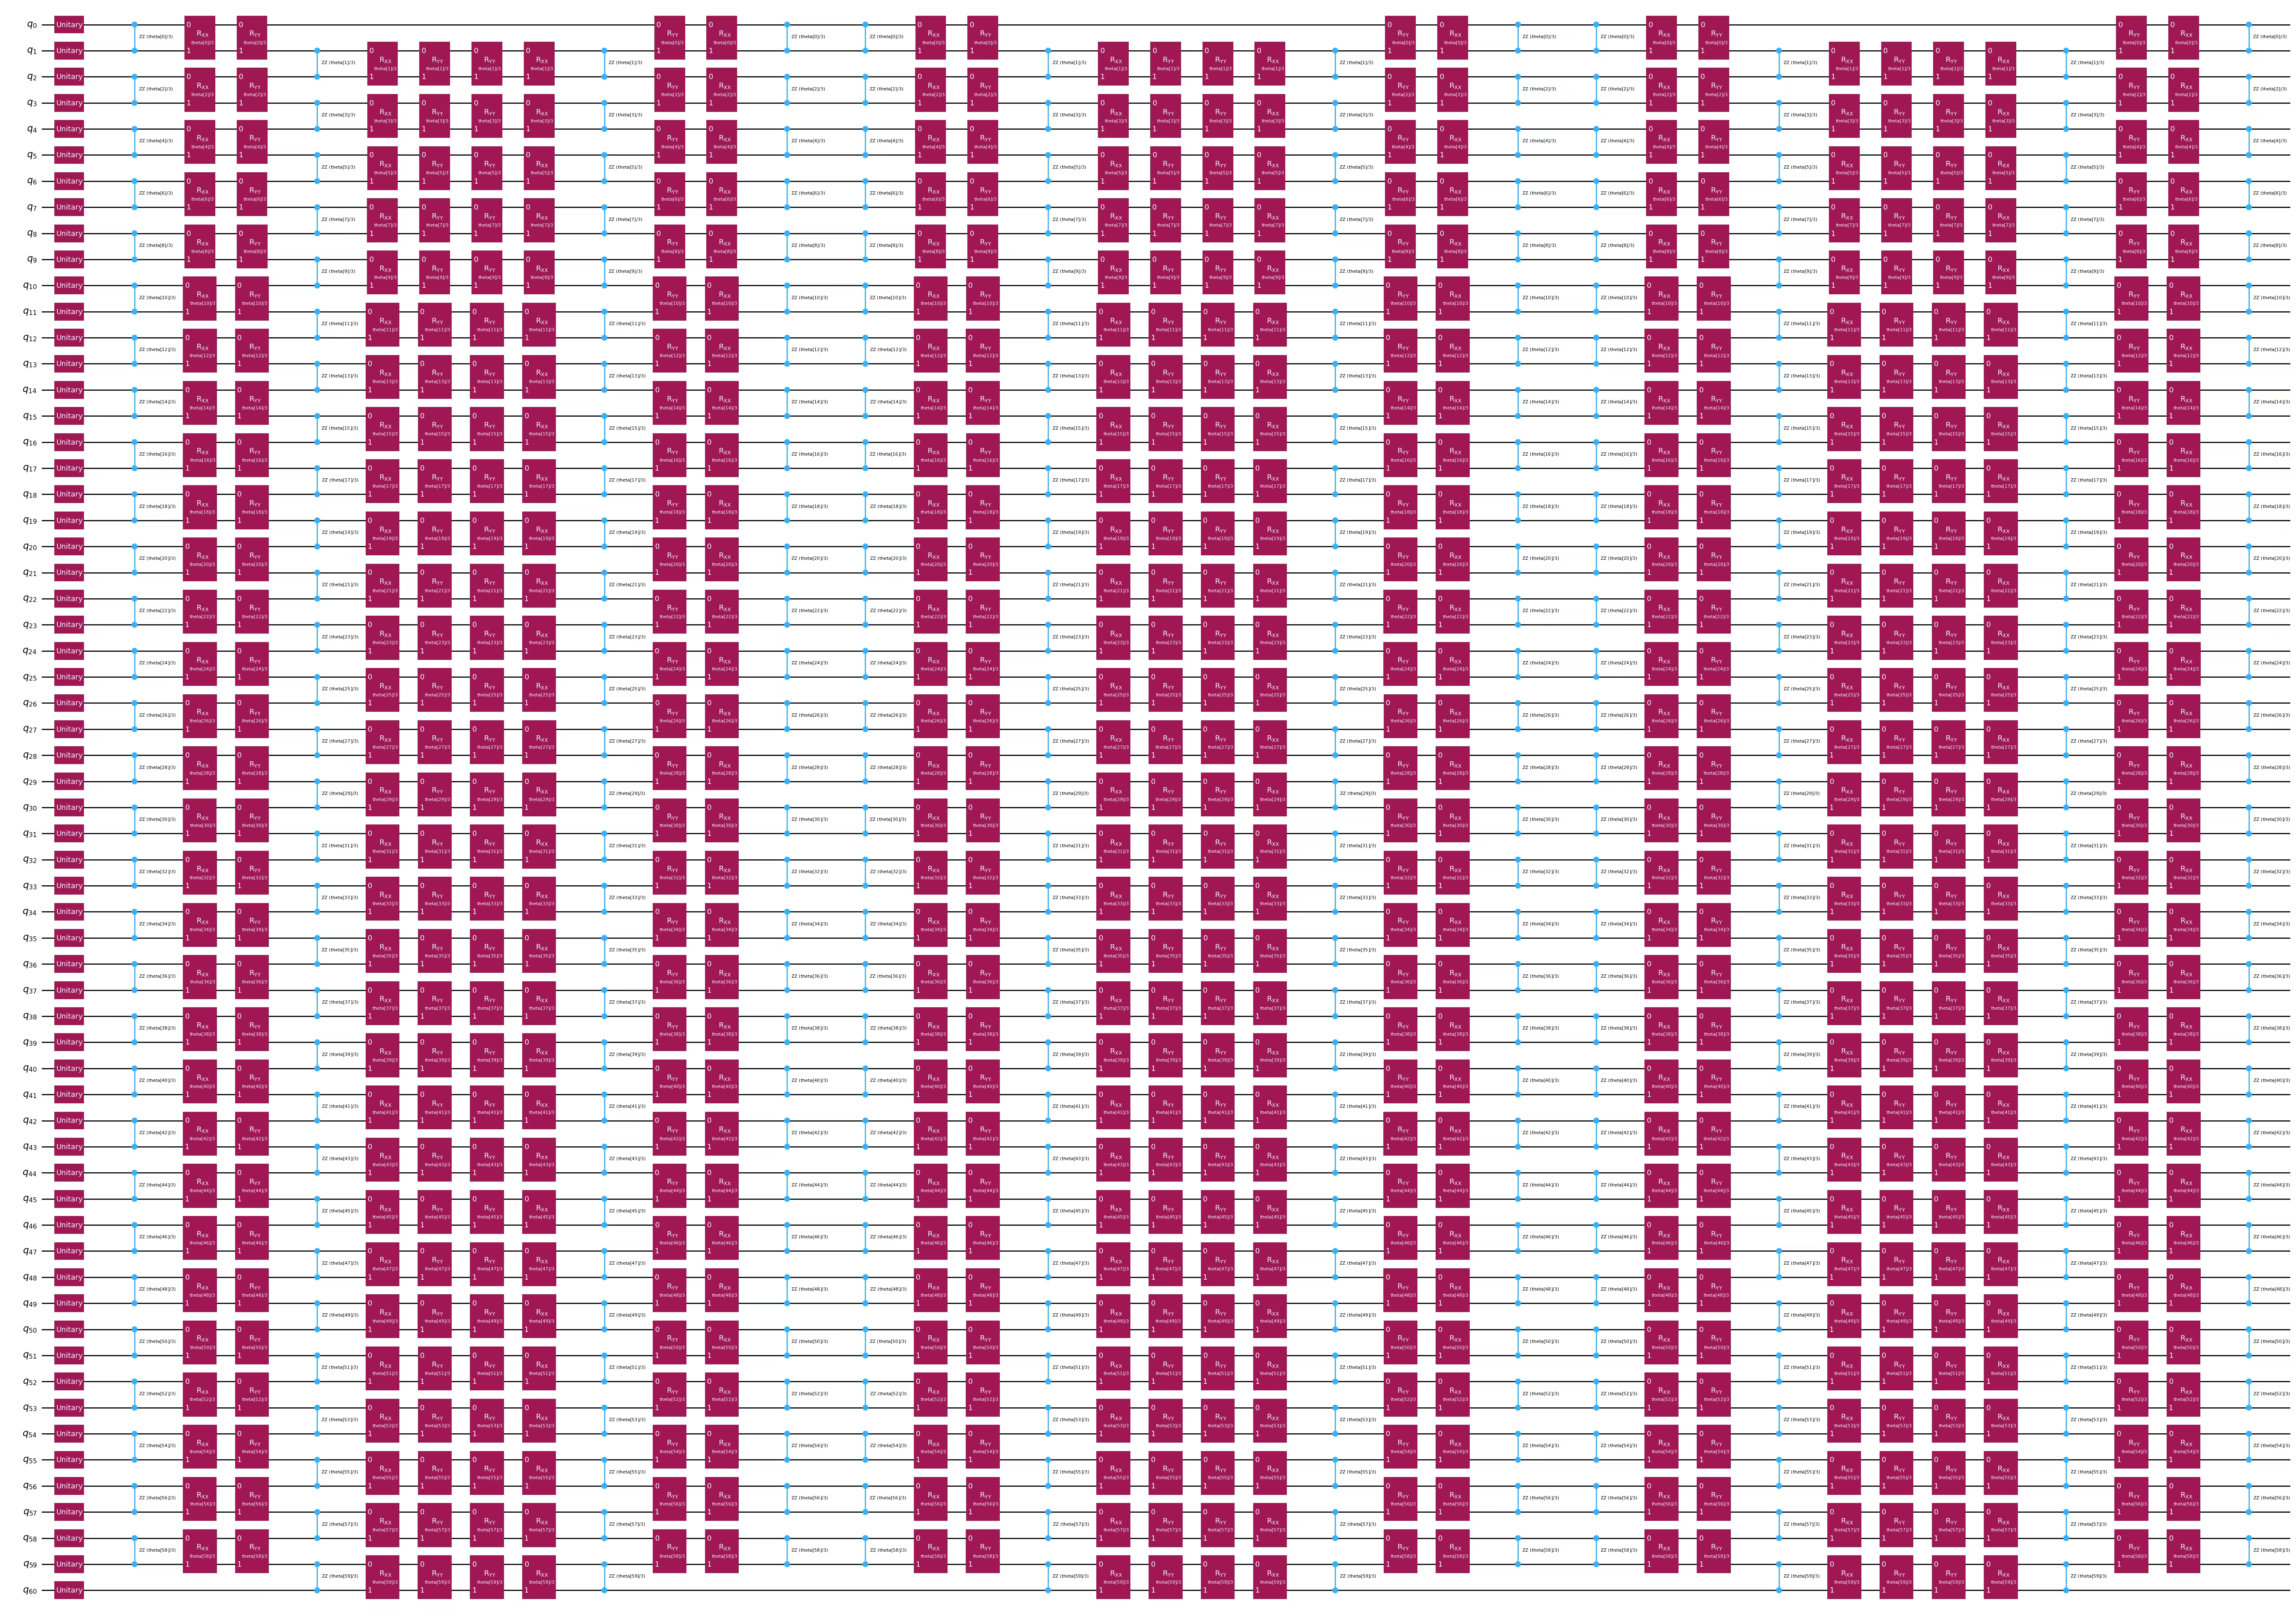
อีกตัวเลือกสำหรับการฝังควอนตัมคือ ansatz การวิวัฒนาการของ Hamiltonian แบบ 1D-Heisenberg คุณสามารถข้ามส่วนนี้ได้ถ้าต้องการดำเนินการต่อด้วย ZZFeatureMap
feature_dimension = train_data.shape[1]
num_qubits = feature_dimension + 1
embed2 = QuantumCircuit(num_qubits)
num_trotter_steps = 6
pv_length = feature_dimension * num_trotter_steps
pv = ParameterVector("theta", pv_length)

# Add Haar random single qubit unitary to each qubit as initial state
np.random.seed(42)
seeds_unitary = np.random.randint(0, 100, num_qubits)
for i in range(num_qubits):
    rand_gate = UnitaryGate(random_unitary(2, seed=seeds_unitary[i]))
    embed2.append(rand_gate, [i])

def trotter_circ(feature_dimension, num_trotter_steps):
    num_qubits = feature_dimension + 1
    circ = QuantumCircuit(num_qubits)
    # Even
    for i in range(0, feature_dimension, 2):
        circ.rzz(2 * pv[i] / num_trotter_steps, i, i + 1)
    for i in range(0, feature_dimension, 2):
        circ.rxx(2 * pv[i] / num_trotter_steps, i, i + 1)
    for i in range(0, feature_dimension, 2):
        circ.ryy(2 * pv[i] / num_trotter_steps, i, i + 1)
    # Odd
    for i in range(1, feature_dimension, 2):
        circ.rzz(2 * pv[i] / num_trotter_steps, i, i + 1)
    for i in range(1, feature_dimension, 2):
        circ.rxx(2 * pv[i] / num_trotter_steps, i, i + 1)
    for i in range(1, feature_dimension, 2):
        circ.ryy(2 * pv[i] / num_trotter_steps, i, i + 1)
    return circ

# Hamiltonian evolution ansatz
for step in range(num_trotter_steps):
    circ = trotter_circ(feature_dimension, num_trotter_steps)
    if step % 2 == 0:
        embed2 = embed2.compose(circ)
    else:
        reverse_circ = circ.reverse_ops()
        embed2 = embed2.compose(reverse_circ)

embed2.draw(output="mpl", style="iqp", fold=-1)
ขั้นตอนที่ 3: รันด้วย Qiskit primitives
วัด 1-RDMs
ในขั้นตอนนี้เราจะหา single-qubit reduced density matrices (1-RDMs) ทั้งหมดผ่านการวัดแบบ projective ของ quantum feature map ซึ่งจะถูกนำไปใช้กับฟังก์ชัน classical exponential kernel ในภายหลัง
มาดูวิธีคำนวณ 1-RDM จากจุดข้อมูลเดียวในชุดข้อมูลก่อน แล้วค่อยรันทั้งหมด 1-RDMs คือชุดการวัด single-qubit ของตัวดำเนินการ Pauli X, Y และ Z บนทุก Qubit เพราะ single-qubit RDM สามารถแสดงได้อย่างสมบูรณ์ว่า:
ก่อนอื่นเลือก Backend ที่จะใช้
service = QiskitRuntimeService()
backend = service.least_busy(
    operational=True, simulator=False, min_num_qubits=133
)
target = backend.target
จากนั้นรัน quantum circuit และวัด projections โดยเปิดใช้งาน error mitigation รวมถึง Zero Noise Extrapolation (ZNE)
# Let's select the ZZFeatureMap embedding for this example
qc = embed
num_qubits = feature_dimension

# Identity operator on all qubits
id = "I" * num_qubits

# Let's select the first training datapoint as an example
parameters = train_data[0]

# Bind parameter to the circuit and simplify it
qc_bound = qc.assign_parameters(parameters)
transpiler = generate_preset_pass_manager(
    optimization_level=3, basis_gates=["u3", "cz"]
)
transpiled_circuit = transpiler.run(qc_bound)

# Transpile for hardware
transpiler = generate_preset_pass_manager(optimization_level=3, target=target)
transpiled_circuit = transpiler.run(transpiled_circuit)

# We group all commuting observables
# These groups are the Pauli X, Y and Z operators on individual qubits
observables_x = [
    SparsePauliOp(id[:i] + "X" + id[(i + 1) :]).apply_layout(
        transpiled_circuit.layout
    )
    for i in range(num_qubits)
]
observables_y = [
    SparsePauliOp(id[:i] + "Y" + id[(i + 1) :]).apply_layout(
        transpiled_circuit.layout
    )
    for i in range(num_qubits)
]
observables_z = [
    SparsePauliOp(id[:i] + "Z" + id[(i + 1) :]).apply_layout(
        transpiled_circuit.layout
    )
    for i in range(num_qubits)
]

# We define the primitive unified blocs (PUBs) consisting of the embedding circuit,
# set of observables and the circuit parameters
pub_x = (transpiled_circuit, observables_x)
pub_y = (transpiled_circuit, observables_y)
pub_z = (transpiled_circuit, observables_z)

# Experiment options for error mitigation
num_randomizations = 300
shots_per_randomization = 100
noise_factors = [1, 3, 5]

experimental_opts = {}
experimental_opts["resilience"] = {
    "measure_mitigation": True,
    "zne_mitigation": True,
    "zne": {
        "noise_factors": noise_factors,
        "amplifier": "gate_folding",
        "extrapolated_noise_factors": [0] + noise_factors,
    },
}
experimental_opts["twirling"] = {
    "num_randomizations": num_randomizations,
    "shots_per_randomization": shots_per_randomization,
    "strategy": "active-accum",
}

# We define and run the estimator to obtain <X>, <Y> and <Z> on all qubits
estimator = Estimator(mode=backend, options=experimental_opts)

job = estimator.run([pub_x, pub_y, pub_z])
ถัดมาดึงผลลัพธ์
job_result_x = job.result()[0].data.evs
job_result_y = job.result()[1].data.evs
job_result_z = job.result()[2].data.evs
print(job_result_x)
print(job_result_y)
print(job_result_z)
[ 3.67865951e-03  1.01158571e-02 -3.95790878e-02  6.33984326e-03
  1.86035759e-02 -2.91533268e-02 -1.06374793e-01  4.48873518e-18
  4.70201764e-02  3.53997968e-02  2.53130819e-02  3.23903401e-02
  6.06327843e-03  1.16313667e-02 -1.12387504e-02 -3.18457725e-02
 -4.16445718e-04 -1.45609602e-03 -4.21737114e-01  2.83705669e-02
  6.91332890e-03 -7.45363001e-02 -1.20139326e-02 -8.85566135e-02
 -3.22648394e-02 -3.24228074e-02  6.20431299e-04  3.04225434e-03
  5.72795792e-03  1.11288428e-02  1.50395861e-01  9.18380197e-02
  1.02553163e-01  2.98312847e-02 -3.30298912e-01 -1.13979648e-01
  4.49159340e-03  8.63861493e-02  3.05666566e-02  2.21463145e-04
  1.45946735e-02  8.54537275e-03 -8.09805979e-02 -2.92608104e-02
 -3.91243644e-02 -3.96632760e-02 -1.41187613e-01 -1.07363243e-01
  1.81089440e-02  2.70778895e-02  1.45139414e-02  2.99480458e-02
  4.99137134e-02  7.08789852e-02  4.30565759e-02  8.71287156e-02
  1.04334798e-01  7.72191962e-02  7.10059720e-02  1.04650403e-01]
[-7.31765102e-05  7.42669174e-03  9.82277344e-03  5.92638249e-02
  4.24120486e-02 -9.06473416e-03  4.55057675e-03  8.43494094e-03
  6.92097339e-02 -6.82234424e-02  6.13509008e-02  3.94200491e-02
 -1.24037979e-02  1.01976642e-01  7.90538600e-03 -7.19726160e-02
 -1.19501703e-16 -1.03796614e-02  7.37382463e-02  1.97238568e-01
 -3.59250635e-02 -2.67554009e-02  3.55010633e-02  7.68877990e-02
  6.50677589e-05 -6.59298767e-03 -1.23719487e-02 -6.41938151e-02
  1.95603072e-02 -2.48448551e-02  5.17784810e-02 -5.93767100e-02
  3.11897681e-02 -3.91959720e-18 -4.47769148e-03  1.39202197e-01
 -6.56387523e-02 -5.85665483e-02  9.52905894e-03 -8.61460731e-02
  3.91790656e-02 -1.27544375e-01  1.63712244e-01  3.36816934e-04
  2.26230028e-02 -2.45023393e-05  4.95635588e-03  1.44779564e-01
  3.71625177e-02  3.65675948e-03  2.83694017e-02 -7.10500602e-02
 -1.15467702e-01  6.21712129e-03 -4.80958959e-02  2.21021066e-02
  7.99062499e-02 -1.87164076e-02 -3.67100369e-02 -2.38923731e-02]
[ 6.85871605e-01  5.07725024e-01  8.71024642e-03  3.34823455e-02
  4.58684961e-02  9.44384189e-17 -4.46829296e-02 -2.91296778e-02
  4.15466461e-02  2.89628330e-02  1.88624017e-03  5.37110446e-02
  2.59579053e-03  1.39327071e-02 -2.90781778e-02  5.07209866e-03
  5.83403000e-02  2.60764440e-02  4.45999706e-17 -6.66701417e-03
  3.03215873e-01  2.26172533e-02  2.43105960e-02  4.98861041e-18
 -2.45530791e-02  6.26940708e-02  1.21058073e-02  2.76675948e-04
  2.63980996e-02  2.58302364e-02  7.47856723e-02  8.42728943e-02
  5.70989097e-02  6.92955086e-02 -5.68313712e-03  1.32199452e-01
  8.90511238e-02 -3.45204621e-02 -1.05445836e-01  6.03864150e-03
  2.16291384e-02  8.22303162e-03  1.00856715e-02  6.28973151e-02
  6.26727169e-02  6.15399206e-02  9.67320897e-02  1.03045269e-16
  1.79688783e-01 -1.59960520e-02 -1.15422952e-02  9.60200470e-03
  6.58396672e-02  7.78329830e-03  6.53226955e-02  2.45778685e-03
  4.36694753e-03  5.75098762e-03 -2.48896201e-02  8.33740755e-05]
แสดงขนาด circuit และความลึกของ two-qubit gate
print(f"qubits: {qc.num_qubits}")
print(
    f"2q-depth: {transpiled_circuit.depth(lambda x: x.operation.num_qubits==2)}"
)
print(
    f"2q-size: {transpiled_circuit.size(lambda x: x.operation.num_qubits==2)}"
)
print(f"Operator counts: {transpiled_circuit.count_ops()}")
transpiled_circuit.draw("mpl", fold=-1, style="clifford", idle_wires=False)
qubits: 60
2q-depth: 64
2q-size: 1888
Operator counts: OrderedDict({'rz': 6016, 'sx': 4576, 'cz': 1888, 'x': 896, 'barrier': 31})

ตอนนี้เราสามารถวนลูปชุดข้อมูล training ทั้งหมดเพื่อหา 1-RDMs ทุกค่า
เรายังแนบผลลัพธ์จากการทดลองที่รันบนฮาร์ดแวร์ quantum จริงด้วย คุณสามารถรัน training เองโดยตั้งค่า flag ด้านล่างเป็น True หรือใช้ผลลัพธ์ projection ที่เราเตรียมไว้ให้ก็ได้
# Set this to True if you want to run the training on hardware
run_experiment = False
# Identity operator on all qubits
id = "I" * num_qubits

# projections_train[i][j][k] will be the expectation value of the j-th
# Pauli operator (0: X, 1: Y, 2: Z) of datapoint i on qubit k
projections_train = []
jobs_train = []

# Experiment options for error mitigation
num_randomizations = 300
shots_per_randomization = 100
noise_factors = [1, 3, 5]

experimental_opts = {}
experimental_opts["resilience"] = {
    "measure_mitigation": True,
    "zne_mitigation": True,
    "zne": {
        "noise_factors": noise_factors,
        "amplifier": "gate_folding",
        "return_all_extrapolated": True,
        "return_unextrapolated": True,
        "extrapolated_noise_factors": [0] + noise_factors,
    },
}
experimental_opts["twirling"] = {
    "num_randomizations": num_randomizations,
    "shots_per_randomization": shots_per_randomization,
    "strategy": "active-accum",
}
options = EstimatorOptions(experimental=experimental_opts)

if run_experiment:
    with Batch(backend=backend):
        for i in tqdm.tqdm(
            range(len(train_data)), desc="Training data progress"
        ):
            # Get training sample
            parameters = train_data[i]

            # Bind parameter to the circuit and simplify it
            qc_bound = qc.assign_parameters(parameters)
            transpiler = generate_preset_pass_manager(
                optimization_level=3, basis_gates=["u3", "cz"]
            )
            transpiled_circuit = transpiler.run(qc_bound)

            # Transpile for hardware
            transpiler = generate_preset_pass_manager(
                optimization_level=3, target=target
            )
            transpiled_circuit = transpiler.run(transpiled_circuit)

            # We group all commuting observables
            # These groups are the Pauli X, Y and Z operators on individual qubits
            observables_x = [
                SparsePauliOp(id[:i] + "X" + id[(i + 1) :]).apply_layout(
                    transpiled_circuit.layout
                )
                for i in range(num_qubits)
            ]
            observables_y = [
                SparsePauliOp(id[:i] + "Y" + id[(i + 1) :]).apply_layout(
                    transpiled_circuit.layout
                )
                for i in range(num_qubits)
            ]
            observables_z = [
                SparsePauliOp(id[:i] + "Z" + id[(i + 1) :]).apply_layout(
                    transpiled_circuit.layout
                )
                for i in range(num_qubits)
            ]

            # We define the primitive unified blocs (PUBs) consisting
            # of the embedding circuit,
            # set of observables and the circuit parameters
            pub_x = (transpiled_circuit, observables_x)
            pub_y = (transpiled_circuit, observables_y)
            pub_z = (transpiled_circuit, observables_z)

            # We define and run the estimator to obtain <X>, <Y> and <Z>
            # on all qubits
            estimator = Estimator(options=options)

            job = estimator.run([pub_x, pub_y, pub_z])
            jobs_train.append(job)
Training data progress: 100%|██████████| 172/172 [13:03<00:00, 4.55s/it]
เมื่อ jobs เสร็จแล้ว เราสามารถดึงผลลัพธ์ได้
if run_experiment:
    for i in tqdm.tqdm(
        range(len(train_data)), desc="Retrieving training data results"
    ):
        # Completed job
        job = jobs_train[i]

        # Job results
        job_result_x = job.result()[0].data.evs
        job_result_y = job.result()[1].data.evs
        job_result_z = job.result()[2].data.evs

        # Record <X>, <Y> and <Z> on all qubits for the current datapoint
        projections_train.append([job_result_x, job_result_y, job_result_z])
ทำซ้ำขั้นตอนเดียวกันสำหรับชุดข้อมูล test
# Identity operator on all qubits
id = "I" * num_qubits

# projections_test[i][j][k] will be the expectation value of the
# j-th Pauli operator (0: X, 1: Y, 2: Z) of datapoint i on qubit k
projections_test = []
jobs_test = []

# Experiment options for error mitigation
num_randomizations = 300
shots_per_randomization = 100
noise_factors = [1, 3, 5]

experimental_opts = {}
experimental_opts["resilience"] = {
    "measure_mitigation": True,
    "zne_mitigation": True,
    "zne": {
        "noise_factors": noise_factors,
        "amplifier": "gate_folding",
        "return_all_extrapolated": True,
        "return_unextrapolated": True,
        "extrapolated_noise_factors": [0] + noise_factors,
    },
}
experimental_opts["twirling"] = {
    "num_randomizations": num_randomizations,
    "shots_per_randomization": shots_per_randomization,
    "strategy": "active-accum",
}
options = EstimatorOptions(experimental=experimental_opts)

if run_experiment:
    with Batch(backend=backend):
        for i in tqdm.tqdm(range(len(test_data)), desc="Test data progress"):
            # Get test sample
            parameters = test_data[i]

            # Bind parameter to the circuit and simplify it
            qc_bound = qc.assign_parameters(parameters)
            transpiler = generate_preset_pass_manager(
                optimization_level=3, basis_gates=["u3", "cz"]
            )
            transpiled_circuit = transpiler.run(qc_bound)

            # Transpile for hardware
            transpiler = generate_preset_pass_manager(
                optimization_level=3, target=target
            )
            transpiled_circuit = transpiler.run(transpiled_circuit)

            # We group all commuting observables
            # These groups are the Pauli X, Y and Z operators on individual qubits
            observables_x = [
                SparsePauliOp(id[:i] + "X" + id[(i + 1) :]).apply_layout(
                    transpiled_circuit.layout
                )
                for i in range(num_qubits)
            ]
            observables_y = [
                SparsePauliOp(id[:i] + "Y" + id[(i + 1) :]).apply_layout(
                    transpiled_circuit.layout
                )
                for i in range(num_qubits)
            ]
            observables_z = [
                SparsePauliOp(id[:i] + "Z" + id[(i + 1) :]).apply_layout(
                    transpiled_circuit.layout
                )
                for i in range(num_qubits)
            ]

            # We define the primitive unified blocs (PUBs) consisting of
            # the embedding circuit,
            # set of observables and the circuit parameters
            pub_x = (transpiled_circuit, observables_x)
            pub_y = (transpiled_circuit, observables_y)
            pub_z = (transpiled_circuit, observables_z)

            # We define and run the estimator to obtain <X>, <Y> and <Z> on all qubits
            estimator = Estimator(options=options)

            job = estimator.run([pub_x, pub_y, pub_z])
            jobs_test.append(job)
Test data progress: 100%|██████████| 74/74 [00:13<00:00, 5.56it/s]
ดึงผลลัพธ์ได้เหมือนก่อนหน้า
if run_experiment:
    for i in tqdm.tqdm(
        range(len(test_data)), desc="Retrieving test data results"
    ):
        # Completed job
        job = jobs_test[i]

        # Job results
        job_result_x = job.result()[0].data.evs
        job_result_y = job.result()[1].data.evs
        job_result_z = job.result()[2].data.evs

        # Record <X>, <Y> and <Z> on all qubits for the current datapoint
        projections_test.append([job_result_x, job_result_y, job_result_z])
ขั้นตอนที่ 4: ประมวลผลหลังและคืนค่าผลลัพธ์ในรูปแบบคลาสสิกที่ต้องการ
กำหนด projected quantum kernel
Projected quantum kernel ถูกนิยามด้วยฟังก์ชัน kernel ดังนี้:
ในสมการข้างต้น คือ hyperparameter ที่ปรับแต่งได้ ส่วน คือองค์ประกอบของ kernel matrix
จากนิยามของ 1-RDM เราจะเห็นว่าแต่ละเทอมภายในฟังก์ชัน kernel สามารถคำนวณได้เป็น โดยที่ ซึ่งค่าความคาดหวังเหล่านี้คือสิ่งที่เราวัดไว้ข้างต้นนั่นเอง
ด้วยการใช้ scikit-learn เราสามารถคำนวณ kernel ได้ง่ายขึ้นอีก เนื่องจากมี radial basis function ('rbf') kernel พร้อมใช้งาน: ขั้นแรก เราแค่ต้อง reshape ชุดข้อมูล training และ test ที่ถูก project แล้วให้เป็น array สองมิติ
ควรทราบว่าการประมวลผลชุดข้อมูลทั้งหมดบน QPU อาจใช้เวลาประมาณ 80 นาที เพื่อให้ส่วนที่เหลือของบทเรียนนี้ทำงานได้ง่าย เราจึงมี projection จากการทดลองที่รันก่อนหน้านี้ไว้ด้วย (ซึ่งรวมอยู่ในไฟล์ที่ดาวน์โหลดในโค้ดบล็อก Download dataset) ถ้าคุณทำ training เองแล้ว สามารถดำเนินบทเรียนต่อด้วยผลลัพธ์ของตัวเองได้
if run_experiment:
    projections_train = np.array(projections_train).reshape(
        len(projections_train), -1
    )
    projections_test = np.array(projections_test).reshape(
        len(projections_test), -1
    )
else:
    projections_train = np.loadtxt("projections_train.txt")
    projections_test = np.loadtxt("projections_test.txt")
Support Vector Machine (SVM)
ตอนนี้เราสามารถรัน SVM แบบคลาสสิกบน kernel ที่คำนวณไว้ล่วงหน้านี้ได้แล้ว และใช้ kernel ระหว่างชุด test กับ training สำหรับการทำนาย
# Range of 'C' and 'gamma' values as SVC hyperparameters
C_range = [0.001, 0.005, 0.007]
C_range.extend([x * 0.01 for x in range(1, 11)])
C_range.extend([x * 0.25 for x in range(1, 60)])
C_range.extend(
    [
        20,
        50,
        100,
        200,
        500,
        700,
        1000,
        1100,
        1200,
        1300,
        1400,
        1500,
        1700,
        2000,
    ]
)

gamma_range = ["auto", "scale", 0.001, 0.005, 0.007]
gamma_range.extend([x * 0.01 for x in range(1, 11)])
gamma_range.extend([x * 0.25 for x in range(1, 60)])
gamma_range.extend([20, 50, 100])

param_grid = dict(C=C_range, gamma=gamma_range)

# Support vector classifier
svc = SVC(kernel="rbf")

# Define the cross validation
cv = StratifiedKFold(n_splits=10)

# Grid search for hyperparameter tuning (q: quantum)
grid_search_q = GridSearchCV(
    svc, param_grid, cv=cv, verbose=1, n_jobs=-1, scoring="f1_weighted"
)
grid_search_q.fit(projections_train, train_labels)

# Best model with best parameters
best_svc_q = grid_search_q.best_estimator_
print(
    f"The best parameters are {grid_search_q.best_params_} with a score of {grid_search_q.best_score_:.4f}"
)

# Test accuracy
accuracy_q = best_svc_q.score(projections_test, test_labels)
print(f"Test accuracy with best model: {accuracy_q:.4f}")
Fitting 10 folds for each of 6622 candidates, totalling 66220 fits
The best parameters are {'C': 8.5, 'gamma': 0.01} with a score of 0.6980
Test accuracy with best model: 0.8108
การเปรียบเทียบแบบคลาสสิก
เราสามารถรัน SVM แบบคลาสสิกโดยใช้ radial basis function เป็น kernel โดยไม่ต้องทำ quantum projection ผลลัพธ์นี้คือ benchmark แบบคลาสสิกของเรา
# Support vector classifier
svc = SVC(kernel="rbf")

# Grid search for hyperparameter tuning (c: classical)
grid_search_c = GridSearchCV(
    svc, param_grid, cv=cv, verbose=1, n_jobs=-1, scoring="f1_weighted"
)
grid_search_c.fit(train_data, train_labels)

# Best model with best parameters
best_svc_c = grid_search_c.best_estimator_
print(
    f"The best parameters are {grid_search_c.best_params_} with a score of {grid_search_c.best_score_:.4f}"
)

# Test accuracy
accuracy_c = best_svc_c.score(test_data, test_labels)
print(f"Test accuracy with best model: {accuracy_c:.4f}")
Fitting 10 folds for each of 6622 candidates, totalling 66220 fits
The best parameters are {'C': 10.75, 'gamma': 0.04} with a score of 0.7830
Test accuracy with best model: 0.7432
ภาคผนวก: ตรวจสอบศักยภาพของชุดข้อมูลในการได้เปรียบเชิงควอนตัมในงาน learning
ไม่ใช่ทุกชุดข้อมูลที่จะได้ประโยชน์จากการใช้ PQK มีขอบเขตทางทฤษฎีบางอย่างที่ใช้เป็นการทดสอบเบื้องต้นเพื่อดูว่าชุดข้อมูลใดชุดหนึ่งจะได้ประโยชน์จาก PQK หรือไม่ เพื่อวัดค่านี้ ผู้เขียนของ Power of data in quantum machine learning [2] ได้นิยามปริมาณที่เรียกว่า classical และ quantum model complexities และ geometric separation ของโมเดลคลาสสิกและโมเดลควอนตัม เพื่อคาดหวังถึงความได้เปรียบเชิงควอนตัมที่อาจเกิดขึ้นจาก PQK การแยกเชิงเรขาคณิต (geometric separation) ระหว่าง kernel แบบคลาสสิกและแบบ quantum-projected ควรอยู่ในระดับประมาณ โดยที่ คือจำนวนตัวอย่าง training ถ้าเงื่อนไขนี้เป็นจริง เราก็ไปตรวจสอบ model complexities ต่อ ถ้า classical model complexity อยู่ในระดับ ในขณะที่ quantum-projected model complexity น้อยกว่า อย่างมีนัยสำคัญ เราก็สามารถคาดหวังได้ว่า PQK จะให้ข้อได้เปรียบ Geometric separation นิยามดังนี้ (F19 ใน [2]):
# Gamma values used in best models above
gamma_c = grid_search_c.best_params_["gamma"]
gamma_q = grid_search_q.best_params_["gamma"]

# Regularization parameter used in the best classical model above
C_c = grid_search_c.best_params_["C"]
l_c = 1 / C_c

# Classical and quantum kernels used above
K_c = rbf_kernel(train_data, train_data, gamma=gamma_c)
K_q = rbf_kernel(projections_train, projections_train, gamma=gamma_q)

# Intermediate matrices in the equation
K_c_sqrt = sqrtm(K_c)
K_q_sqrt = sqrtm(K_q)
K_c_inv = inv(K_c + l_c * np.eye(K_c.shape[0]))
K_multiplication = (
    K_q_sqrt @ K_c_sqrt @ K_c_inv @ K_c_inv @ K_c_sqrt @ K_q_sqrt
)

# Geometric separation
norm = np.linalg.norm(K_multiplication, ord=np.inf)
g_cq = np.sqrt(norm)
print(
    f"Geometric separation between classical and quantum kernels is {g_cq:.4f}"
)

print(np.sqrt(len(train_data)))
Geometric separation between classical and quantum kernels is 1.5440
13.114877048604
Model complexity นิยามดังนี้ (M1 ใน [2]):
# Model complexity of the classical kernel

# Number of training data
N = len(train_data)

# Predicted labels
pred_labels = best_svc_c.predict(train_data)
pred_matrix = np.outer(pred_labels, pred_labels)

# Intermediate terms
K_c_inv = inv(K_c + l_c * np.eye(K_c.shape[0]))

# First term
first_sum = np.sum((K_c_inv @ K_c_inv) * pred_matrix)
first_term = l_c * np.sqrt(first_sum / N)

# Second term
second_sum = np.sum((K_c_inv @ K_c @ K_c_inv) * pred_matrix)
second_term = np.sqrt(second_sum / N)

# Model complexity
s_c = first_term + second_term
print(f"Classical model complexity is {s_c:.4f}")
Classical model complexity is 1.3578
# Model complexity of the projected quantum kernel

# Number of training data
N = len(projections_train)

# Predicted labels
pred_labels = best_svc_q.predict(projections_train)
pred_matrix = np.outer(pred_labels, pred_labels)

# Regularization parameter used in the best classical model above
C_q = grid_search_q.best_params_["C"]
l_q = 1 / C_q

# Intermediate terms
K_q_inv = inv(K_q + l_q * np.eye(K_q.shape[0]))

# First term
first_sum = np.sum((K_q_inv @ K_q_inv) * pred_matrix)
first_term = l_q * np.sqrt(first_sum / N)

# Second term
second_sum = np.sum((K_q_inv @ K_q @ K_q_inv) * pred_matrix)
second_term = np.sqrt(second_sum / N)

# Model complexity
s_q = first_term + second_term
print(f"Quantum model complexity is {s_q:.4f}")
Quantum model complexity is 1.5806
ขั้นตอนถัดไป
หากคุณพบว่างานนี้น่าสนใจ คุณอาจสนใจเนื้อหาต่อไปนี้:
- คอร์ส quantum machine learning เชิงลึกจาก IBM Quantum Learning
- บทช่วยสอน Quantum kernel training
อ้างอิง
- Utro, Filippo, et al. "Enhanced Prediction of CAR T-Cell Cytotoxicity with Quantum-Kernel Methods." arXiv preprint arXiv:2507.22710 (2025).
- Huang, Hsin-Yuan, et al. "Power of data in quantum machine learning." Nature communications 12.1 (2021): 2631.
- Daniels, Kyle G., et al. "Decoding CAR T cell phenotype using combinatorial signaling motif libraries and machine learning." Science 378.6625 (2022): 1194-1200.